Report Consolidation User Guide
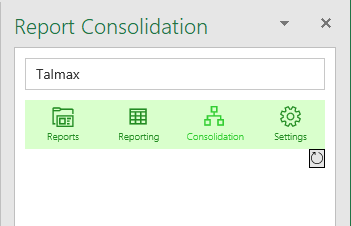
Report Consolidation Main Menu
Under the Report Consolidation Main menu there are options for defining and running reports and entry-forms.
- In Reports-section can to run predefined reports and queries.
- In Reporting section, you are able retrieve, modify and add report entries. You can also define new reports using existing report fields.
- Admin users can add also new entry and calculation fields.
- Settings section is available only for Admin users.
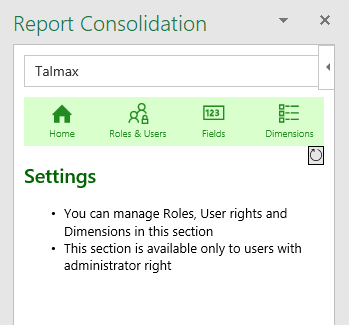
Settings Menu
In Settings section Admin users can manage Roles and User Rights and also Fields and Dimensions of the reports.
- In Roles & Users section Admin can to define User Roles, access rights for user roles and grant access to users.
- In Fields section Admin users can manage entry and calculation fields used in forms and reports.
- In Dimensions section, Admin users can manage dimensions used in entry forms and reports.
- Clicking the Home button, you can return to the Main menu.
Selecting the Instance
Above of the menu ribbon there is the name of Instance you are currently in. By clicking the Instance name, you will see list of all the Instances available for you. You come back by clicking the Instance you intended to continue with.
Refreshing the sheets
By clicking the refresh icon at the right corner just below the menu ribbon, all the data in the sheets will be refreshed from the database.
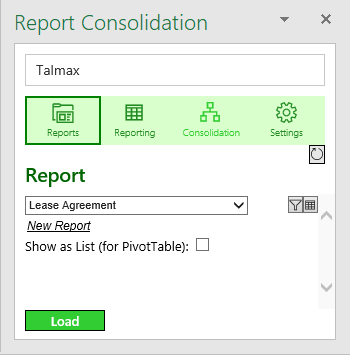
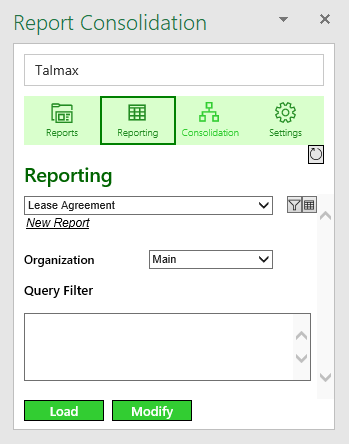
Generating Report
Select the report to run from the drop-down list or select the "New Report" - link to generate a new report.
By crossing the Show as List - checkbox, the result will divide values of each field to separate rows. The list can be directly used as inputs to Pivot and PowerPivot tables.
By clicking the report icon or Load-button below the report will be generated to a sheet having the name of the report. If multiple variations of the same report are generated the following sheet will numbered suffix after report name.
You can open filter option by clicking the filter icon .
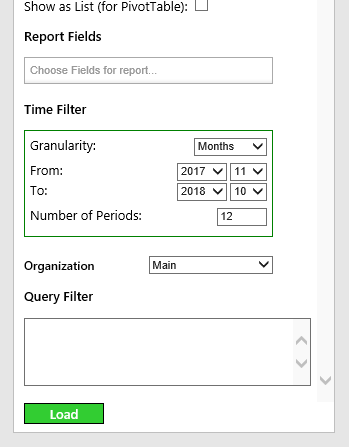
Report Filters
In Report Fields you select one or more Fields to be included in the report. By clicking inside the field, a dropdown showing all available fields for the report will emerge.
In Time Filter you can select time frame and granularity for the report.
Below the Time Filter there will be available all dimension-selections for the report (only one dimension "Organization" is in the example report).
Further filtering can be done using Query Filter. Any Field can be used as Filter and compared with a constant and separate filter elements that has to be separated by a "|".
For Ex. Agreement Number>=100|Item Group=Cars
Generating list of Report entries
Select the report to run from the drop-down list or select the "New Report" - link to generate a new report.
If Dimension selections and Query Filter are not visible, you can activate them by clicking filter icon . You can filter the retrieved entries with dimensions.
Further filtering can be done using Query Filter. Any Field can be used as Filter and compared with a constant and separate filter elements that has to be separated by a "|".
For Ex. Agreement Number>=100|Item Group=Cars
By clicking the Load button, a new sheet with list of selected report entries is generated.
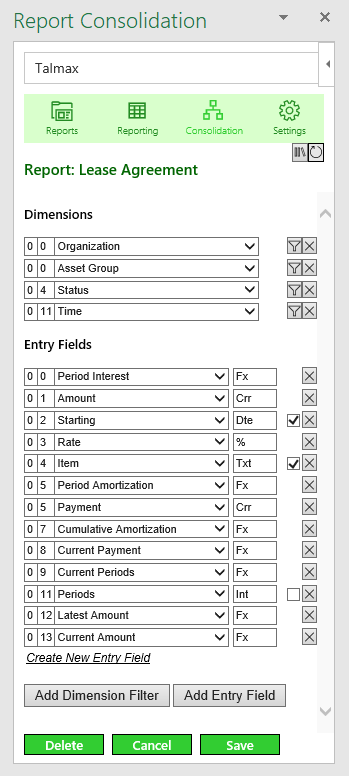
Defining the Report
You can build the report entry form from available Dimensions and Entry Fields. Admin users can generate here also new Entry Fields. You need to include also all the calculations Fields here in order to be utilize the calculations in Reports.
Group and Order
There are two number fields prior to the Dimension and Entry Field names in the form. They specify relative the location of the Field. The first number specifies the group amd second the order in the group for the Field. The group and order numbers specify the location of the Field in Entry Form.
Dimensions
You can add an existing Dimension for the report by clicking the Add Dimension Filter button. New Dimension row will be added to the list and you can select the Dimension from the dropdown menu by clicking the chevron at the right end of the dimension field
You can also filter what dimension values are available in the report entries using the filter option at the respective Dimension row.
Entry Fields
You can add new Entry Fields for the report by clicking the Add Entry Field button at the bottom of the report configurator. You can select the Entry Field from all the existing Fields. Admin users can create also new entry and calculation Fields. New entry Fields build form open when Create New Entry Field link. Link is not visible for non-Admin users.
ID-field and Date-Field
The identifying field of the report can be either text or integer field. There are a checkbox at the row of each text and integer field from where you can and should select the ID-field. ID-fields have to have an unique value in report entries. You need also select the data field of the report, that will have the time value of report entries.
Removing Dimension and Entry Fields
Dimensions and Entry Fields can be removed from the report by clicking the remove button at the row of the respective Dimension or Field. It removes the Dimension/Field only from the report and it will remain available in the list of all Dimensions and Entry Fields
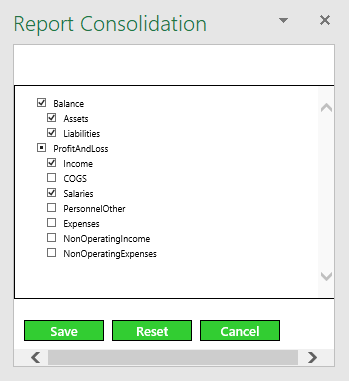
Cross the checkboxes of all the Dimensions that are allowed in Report entries. Subhierarchies of each Dimension values can be opened by clicking the name of the parent Dimension.
When selecting a Dimension that haves subdivisions, then all the dimension values under the selected Dimension value will also be selected.
Settings section is available and visible only to the Admin-users.
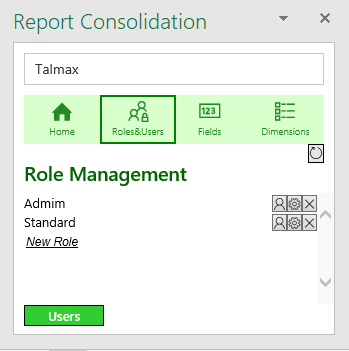
Managing Roles
All existing Roles are listed on the Role-page. You can modify and remove existing roles.
By clicking the Create New Entry Field you can enter a new Role.
You get to Users section by clicking the Users button at the bottom or user icon on the Role row.
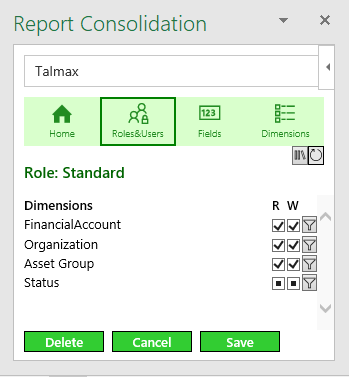
Defining Access Rights for Roles
After you have clicked to modify icon a Role Settings, opens a page where all the available Dimensions are listed. After each Dimension name there is checkboxes for Read and Write. (in first version of Report Consolidation Read and Write rights are equal). By crossing the checkbox all the values of the respective Dimension are available to the Role. Indeterminate mark in the checkbox means, that only the Dimension values selected by the dimension filter are available for the Role. You can also filter the values that are available to the Role by clicking the Filter button.
Filtering Access Rights for Roles
Cross the checkboxes of all the dimension values that are allowed for the respective Role. Subhierarchies of each dimension values can be opened by clicking the name of the parent dimension value.
When selecting a dimension value that havs subvalues, then all the dimension values under the selected dimension value will also be selected.
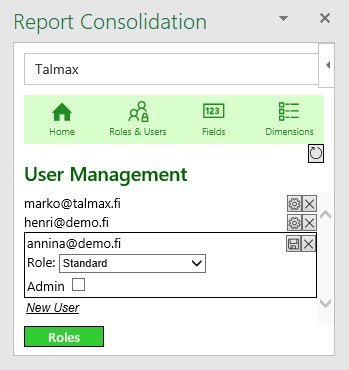
Users
You get to Users section from Roles section by clicking the Users button. In the section you see list of all the Users, that has access to current Instance. You can open the User settings by clicking the Settings icon onthe User row.
On User settings select the Role for the User and if the User is administrator user, then cross the Admin checkbox. Administrator user can manage User rights, Roles, Fields and Dimensions.
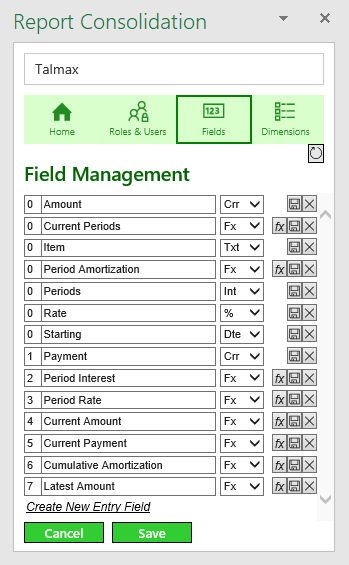
Managing Fields
In the Fields section all the Fields of the Instance is listed. The Number box before the Field name identifies the order of the respective Field.
The dropdown box after the Fieldname identifies the type of the Field. Available Field-types are:
- Txt - for strings
- Int - for integers
- Dec - for decimals
- Crr - for currencies
- % - for percentages
- Dte - for date values
- Fx - for calculated fields
Calculated Fields
You can utilize Excel formula assist to build formulas for Report Consolidation.
To include report Fields in the calculations you can either
- directly enter the name of the Field with a '@' -prefix inside the quote marks
- use the Parameter assistant in the Report Consolidation pane
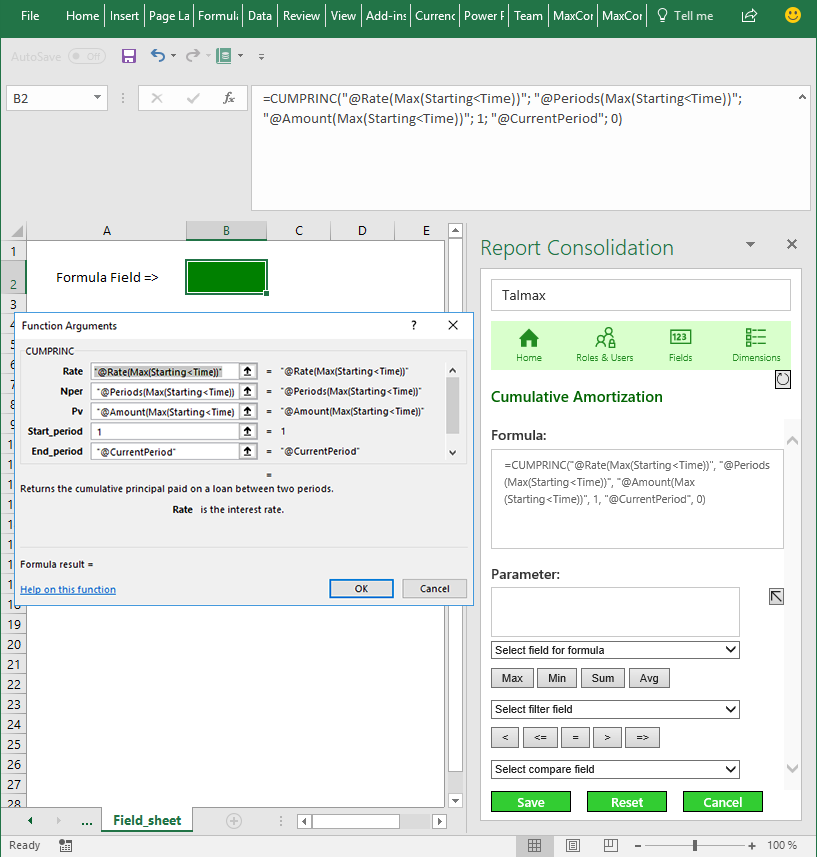
Parameter assistant
Parameter will be generated to the Parameter textbox and you can include the parameter to the cursor position of the Formula field by clicking the up arrow besides the Parameter textbox.
Select the report field from the first dropdown list below the Parameter textbox.
If there are multiple alternative entries with the parameter field you can use filter to select the right value. For ex. latest Rate-value of a contract-entry before reporting time would be "@Rate(latest)", where Rate is the selected field.
There are two predefined Fields available for the formulas:
- Time - dynamic time value in the report
- CurrentPeriod - dynamic period value in the report
For ex. in monthly reports "@Time" is the month-value of each month and "@CurrentPeriod" is the month-number from the beginning of the each entry. Both Time and Period fields can be used in Formulas.
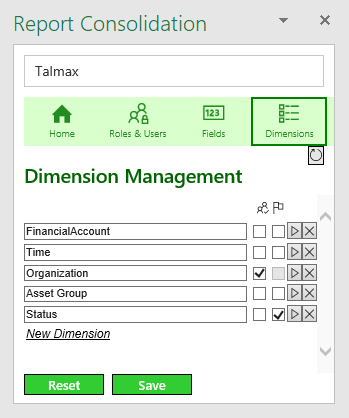
Managing Dimensions
In the Dimensions section you will see list of all the existing Dimensions. You can add a new Dimension by clicking the New Dimension link.
You can manage the list of dimension values in Excel sheet. By clicking the play button on respective Dimension a new sheet will be generated with all the current dimension value options. The name of the Loaded Dimension will also appear under the list of dimensions together with two new buttons:
- Cancel - removes the dimension sheet
- Save Dimensionlist - saves all the modification made in to the dimensionlist in the sheet
You can add and remove dimension values in the sheet, but make sure that values are included in the dimension values list Excel table. You can build as many hierarchy levels as you like by adding new columns.
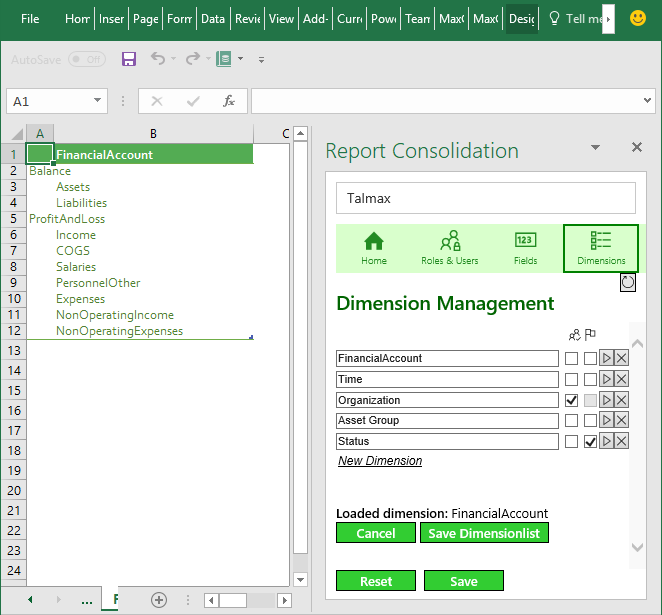
Email Notifications
Email notification can be set to send after dimension value has changed in a report entry. You can select the Dimensions for dimension change notifications by crossing the flag checkbox of respective Dimensions.
The Dimension that determinates who will sent notification to, is selected by crossing the respective notification identification icon . When the dimension value changes, the notification will be sent to users that have Write access right to the same notification Dimensions value and changed Dimensions value as the changed report entry.
In the example picture on the right: Value changes of Status are to be notified and Organization Dimension is the notification identifier.
For ex. when Status is changed in an entry from "InProgress" to "Ready" for approval,
then the notification will be sent to user(s), who has Write access right to "Ready" Status-value and also Write access right to the Organization value of the entry.